
Sauces & Condiments
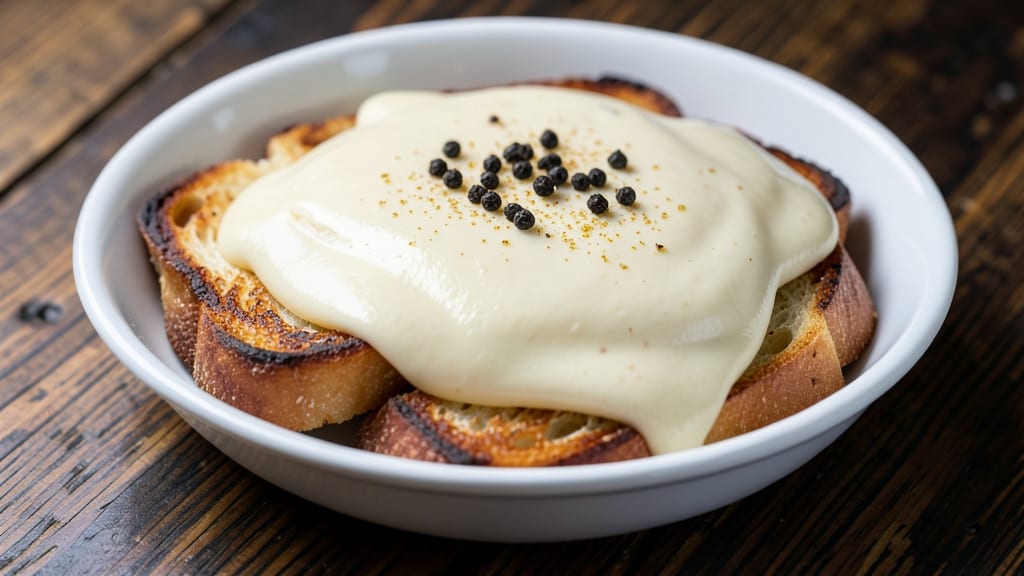
This Philadelphia cheese sauce recipe delivers the creamy, velvety melt that makes everything better—from mac and cheese to loaded baked potatoes. The secret lies in balancing cream cheese and milk for a smooth, thick consistency that clings perfectly without breaking.
I’ve perfected this sauce over years of testing, ensuring it’s rich, flavorful, and foolproof every time.
What sets this recipe apart is the simplicity of its ingredients: just cream cheese, milk, butter, and a touch of seasoning. The process is straightforward—melt, blend, and simmer—but the results are restaurant-quality.
No need for fancy equipment or complicated techniques; just a few minutes of your time for a sauce that elevates any dish.
The final product is a silky, golden sauce that coats noodles, dips chips, or blankets casseroles in a luscious layer of cheesy goodness. It’s thick enough to hold its shape but smooth enough to melt in your mouth, with a subtle tang that keeps it from being too heavy.
This is the kind of sauce that turns ordinary meals into something extraordinary.
Use it as a dip for veggies, a topping for burgers, or the star of a creamy mac and cheese. The possibilities are endless, and the prep is quick—just 10 minutes to a perfectly smooth, velvety finish. Let’s get started!
Ingredients for philadelphia cheese sauce
Four core ingredients create this legendary Philadelphia cheese sauce—rich, velvety, and impossible to resist.
| Ingredient | Amount | Notes |
|---|---|---|
| Philadelphia Cream Cheese 🧀 | 8 oz | Full-fat, block form preferred |
| Unsalted Butter 🧈 | ½ cup | Cold, cut into small cubes |
| Whole Milk 🥛 | 1 ½ cups | Room temperature for smooth blend |
| Diamond Crystal Kosher Salt 🧂 | ½ tsp | Fine grain for even seasoning |
| Ground White Pepper 🌶️ | ¼ tsp | Freshly ground preferred |
| Garlic Powder 🧄 | ¼ tsp | For subtle depth of flavor |
| Extra-Virgin Olive Oil 🫒 | 1 tbsp | For finishing, optional |
The cream cheese is non-negotiable—Philadelphia brand delivers the perfect balance of tang and creaminess. Opt for the block form rather than pre-softened tubs, as it melts more smoothly and avoids graininess. Whole milk is essential for achieving that signature velvety texture; skim or almond milk will result in a thinner, less luxurious sauce. For the butter, unsalted is critical—it prevents over-salting and allows you to control the seasoning precisely. Purchase your cream cheese and butter from specialty grocers like Whole Foods or Eataly for the highest quality, or stick to the block versions at major supermarkets like Kroger or Wegmans for reliable results.
No whole milk? Heavy cream at half the quantity works in a pinch, though the sauce will be slightly richer. Short on cream cheese? Substitute with a 1:1 ratio of sharp cheddar, but expect a slightly more pronounced cheese flavor. The garlic powder can be omitted entirely if you dislike garlic notes, but it adds subtle complexity that elevates the sauce. For a dairy-free adaptation, full-fat coconut milk replaces the milk, though the texture will be slightly lighter. When measuring your Diamond Crystal kosher salt, remember it's finer than table salt—use half the amount if you only have sea salt on hand. The olive oil finishing is entirely optional but adds a luxurious sheen and subtle fruity note that enhances the sauce's depth.
This sauce maintains its velvety texture for 5 days when refrigerated in an airtight container, though it's best used within 3 days for optimal flavor. For longer storage, portion into ice cube trays and freeze—perfect for adding to dishes later. To reheat, warm gently on the stove over low heat, stirring frequently until smooth. Avoid microwaving, as it can create a skin and disrupt the silky consistency. The sauce thickens as it cools, so if it seems too stiff after refrigeration, thin with a splash of warm milk before reheating. Leftovers can also be frozen for up to 3 months in a sealed container, making this an ideal make-ahead sauce for busy weeknights.
Why You'll Love This Recipe
- The secret’s in the slow melt: warm the milk first, then fold in softened cream cheese. No lumps, no grit—just that silky, creamy texture that makes mac and cheese feel like a restaurant dish. (Yes, even on a Tuesday night.)
- 5-Ingredient Magic: I swear by this combo—cream cheese, butter, milk, and a pinch of salt. That’s it. No fancy techniques, no last-minute store runs. Just melt, whisk, and boom, you’ve got a sauce that feels like a hug in a bowl.
- Velvet Smoothness: The secret’s in the slow melt: warm the milk first, then fold in softened cream cheese. No lumps, no grit—just that silky, creamy texture that makes mac and cheese feel like a restaurant dish. (Yes, even on a Tuesday night.)
- Dip Everything: Between us, this sauce is my go-to for lazy nights. Drizzle it over baked potatoes, toss it with roasted veggies, or serve it as a standalone with crackers. It’s the ultimate “I don’t know what I’m hungry for” solution.
Step-by-step instructions for Philadelphia cheese sauce
A velvety, foolproof sauce that requires only basic technique and patience—no lumps, no scrambling, just perfect melt every time.
Melt Butter and Softened Cream Cheese Together
In a medium saucepan, combine the 0.5 cup unsalted butter and 8 oz Philadelphia cream cheese. Place the pan over medium-low heat and stir gently with a silicone spatula, allowing the butter to melt completely before the cream cheese begins to soften. This gradual approach prevents the cream cheese from seizing or developing a grainy texture.
Watch closely as the mixture transforms from solid to smooth—you'll notice the cream cheese first form small clumps before dissolving entirely into a thick, pale yellow paste. This process should take about 3-5 minutes. If you see any areas where the cream cheese isn't melting evenly, use the spatula to gently break it up and incorporate it into the butter. The goal is a completely smooth, lump-free base before adding any liquids.
Gradually Incorporate Warm Milk and Seasonings
Once the butter and cream cheese are fully combined, reduce the heat to low and slowly pour in the 1.5 cups whole milk while whisking continuously. The milk should be at room temperature to prevent the sauce from curdling or developing a skin. Add the milk in a steady stream, whisking vigorously to create small, even bubbles that prevent separation.
After all the milk is incorporated, sprinkle in the 0.5 tsp Diamond Crystal kosher salt, 0.25 tsp ground white pepper, and 0.25 tsp garlic powder. Stir gently to distribute the seasonings evenly. The sauce should now be thick but still pourable, with a smooth, velvety consistency. If you notice any lumps, use the back of the spatula to press them against the side of the pan, allowing the heat to melt them into the sauce.
Simmer Until Silky and Fully Emulsified
Continue simmering the sauce over low heat for 5-7 minutes, stirring occasionally with the silicone spatula. The sauce will gradually thicken as moisture evaporates, but avoid letting it come to a full boil—this can cause the cream cheese to break or the sauce to separate. Instead, maintain a gentle simmer where small bubbles form at the edges but the surface remains mostly calm.
To test for doneness, dip a clean spoon into the sauce and run your finger through it. If it leaves a clean line without any stringiness or resistance, the sauce is ready. If it feels slightly thick or sticky, continue simmering for another 1-2 minutes. The final texture should be smooth, glossy, and cling to the back of the spoon like a thick syrup.
Finish with Olive Oil and Adjust Consistency
Remove the sauce from heat and stir in the 1 tbsp extra-virgin olive oil. This final step adds a subtle richness and helps prevent the sauce from becoming too stiff as it cools. If the sauce is thicker than desired for dipping or topping, thin it slightly by whisking in 1-2 tablespoons of warm milk at a time until it reaches your preferred consistency.
For best results, use the sauce immediately while it's still warm and fluid. If you need to reheat later, do so over low heat, stirring constantly to prevent separation. This sauce is incredibly versatile—perfect for macaroni and cheese, grilled cheese sandwiches, or as a dip for crusty bread. The key to its success lies in patience and gentle heat, ensuring a velvety finish every time.
Pro Tips For Making Philadelphia Cheese Sauce
- Cut the Cheese First: Slice that Philadelphia block into 1-inch cubes before melting—it dissolves faster and more evenly than big hunks. I used to throw in the whole brick and end up with lumps that needed a strainer. (Your blender will hate you less this way.)
- Low and Slow Wins: Simmer the sauce on actual low heat after the butter melts—medium-low isn’t low enough. I learned this after watching my sauce separate into a greasy mess twice. Keep it at a gentle bubble, not a rolling boil.
- Salt the Milk: Toss a pinch of kosher salt into the warm milk before adding it to the cheese mixture. The salt dissolves better this way, and you won’t end up with grainy salt crystals clinging to the back of your pot.
- Whisk Like You Mean It: Use a wire whisk (not a spoon) to break up the cheese at the start—it prevents clumping better. I was lazy with a spoon once and spent 10 minutes scraping lumps off the bottom. (Your future self will thank you.)
Essential equipment for this dish
Medium Saucepan
Your go-to tool for this recipe is a medium (3-quart) stainless steel saucepan—I use my All-Clad Stainless Steel Saucepan because it distributes heat evenly and prevents hot spots that can scorch your sauce.
The 3-quart size gives enough room to stir without splattering while keeping the sauce at an ideal temperature. Avoid nonstick pans for this recipe, as they can't handle the sustained low heat needed to fully emulsify the sauce. 🌡️
Silicone Spatula
A heat-resistant silicone spatula (like the OXO Good Grips Silicone Spatula) is non-negotiable for this sauce. Its flexible edge scrapes every last bit of sauce from the pan, preventing wasted product and ensuring a smooth, lump-free finish.
I keep one dedicated to cheese sauces to avoid cross-contamination with other flavors. The silicone won't melt or warp under direct heat, making it safer than plastic or wooden utensils.
Whisk for Smoothness
While a spatula handles the initial melting, a balloon whisk (I love the Cuisinart Stainless Steel Balloon Whisk) becomes essential when incorporating the milk. The whisk's wire loops create tiny air bubbles that help the sauce emulsify more evenly, preventing separation.
Use it to whisk vigorously in a figure-eight motion when adding the milk—this motion incorporates air and distributes heat more evenly than stirring alone.
Instant-Read Thermometer
Though not strictly necessary, an instant-read thermometer (like the ThermoWorks Thermapen ONE) helps you monitor the sauce's temperature for perfect consistency. The ideal working range is 160-170°F—below this, the sauce may be too thin, and above it risks breaking the cream cheese.
I use mine to check the temperature after the initial simmer to ensure the sauce is fully emulsified without overheating. 💡
Fine-Mesh Strainer
For an ultra-smooth finish, especially if you're using pre-shredded cheese or adding extra flavorings, keep a fine-mesh strainer (like the OXO Good Grips Strainer) nearby. After simmering, strain the sauce through the mesh to remove any potential lumps or bits of garlic powder that might be too coarse.
This step is particularly useful if you're making a large batch or using powdered seasonings that don't dissolve completely.
Optional Immersion Blender
If you prefer an even smoother texture without lumps, an immersion blender (such as the Ninja Foodi Countertop Blender) can work wonders. After combining the butter, cream cheese, and milk, blend directly in the saucepan for 10-15 seconds on low speed.
This step eliminates any remaining lumps and creates a silky, restaurant-quality finish. Just be cautious—over-blending can incorporate too much air, making the sauce too light. Use sparingly for best results.
Nutrition facts
Frequently asked questions
Can I make this sauce without butter?
Yes, you can substitute butter with 1/4 cup melted coconut oil or 1/4 cup neutral oil like vegetable oil for a dairy-free version. The sauce will still achieve that velvety texture, though the flavor will be slightly lighter. For best results, use cold oil instead of melted to mimic butter's behavior when melting the cream cheese.
Why did my sauce get grainy or separate?
Graininess usually happens when the cream cheese melts too quickly or the milk is added too fast. To fix it, lower the heat to low and whisk vigorously while adding the milk in a slow, steady stream. If separation occurs, whisk in 1 tablespoon of cold butter or 1 tablespoon of cream cheese to re-emulsify the sauce. Always use room-temperature milk to prevent curdling.
Can I add other cheeses to this recipe?
For extra depth, try adding 1/2 cup shredded sharp cheddar or 1/4 cup grated Parmesan at the end of cooking. Stir until fully melted and smooth. Avoid adding cheese too early, as it can cause the sauce to break. For a smoky twist, add 1/4 teaspoon smoked paprika or a pinch of cayenne pepper.
How do I adjust the thickness for dipping vs. mac and cheese?
For a dipping consistency, thin the sauce with 1-2 tablespoons of warm milk until it reaches a pourable, glossy state. For mac and cheese or casseroles, let it thicken slightly—it should coat the back of a spoon but still be smooth. If it gets too thick while cooling, reheat gently and whisk in 1 tablespoon of milk at a time until silky.
Can I make this sauce ahead of time?
Yes! Store leftovers in an airtight container in the fridge for up to 5 days. For longer storage, freeze in ice cube trays or small containers for 3 months. To reheat, warm over low heat while stirring constantly—never microwave, as it can cause separation. Stir in a splash of milk if the sauce thickens too much after refrigeration.