
Sauces & Condiments
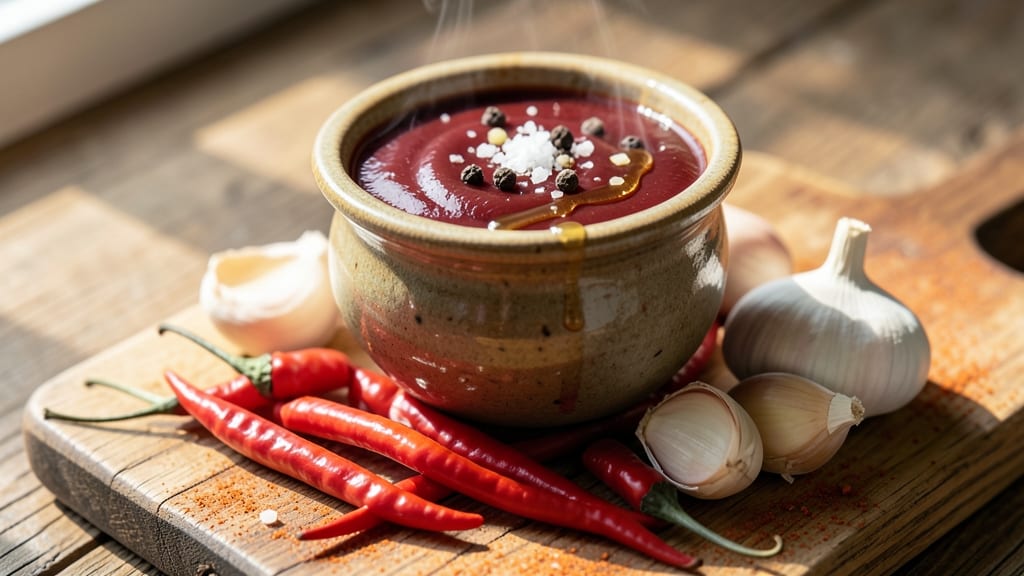
Creating a non-fermented Tabasco sauce that delivers the same bright pepper heat without the waiting period is a game-changer for home cooks. This recipe captures the signature tang and spice using simple ingredients and a quick process—perfect for those who want authentic Tabasco flavor on demand.
The key lies in balancing vinegar, peppers, and spices to mimic the traditional fermented version while skipping the aging step entirely.
What sets this sauce apart is its versatility and speed. Unlike traditional Tabasco, which requires weeks of fermentation, this version comes together in under an hour with just a few pantry staples.
The blend of cayenne peppers and vinegar creates that signature sharpness, while a touch of garlic and salt adds depth. It’s ideal for drizzling on tacos, seafood, or even cocktails—without compromising on flavor.
By the end, you’ll have a smooth, liquid condiment with the same vibrant heat as the original, but ready to use immediately. The sauce keeps well in the refrigerator for up to three months, making it a foolproof addition to your kitchen staples.
Whether you need a quick batch for a recipe or a backup for your favorite dishes, this method delivers consistent results every time.
For those who prefer milder heat, simply reduce the cayenne pepper quantity or strain out some of the finer particles. The recipe scales easily, so you can make a small batch for personal use or double it for gifting.
Let’s get started on this bright, peppery condiment that’s always ready when you need it.
Ingredients for non fermented tabasco sauce
Eight simple ingredients deliver the same bold Tabasco kick—no waiting required.
| Ingredient | Amount | Notes |
|---|---|---|
| White Vinegar 💧 | 1 cup | Distilled white preferred |
| Cayenne Peppers 🌶️ | 4 whole | Fresh, medium heat preferred |
| Garlic Cloves 🧄 | 2 cloves | Fresh, peeled, rough chopped |
| Salt 🧂 | 1 ½ tsp | Kosher or sea salt |
| Ground Black Pepper 🌶️ | ½ tsp | Freshly ground preferred |
| Sugar 🍚 | 1 tbsp | White granulated sugar |
| Extra-Virgin Olive Oil 🫒 | 1 tbsp | For richness and smoothness |
| Water 💧 | ½ cup | Filtered preferred |
The cayenne peppers are the heart of this sauce, so pick fresh, medium-heat ones—they’re easier to handle than super-hot varieties. Whole Foods or Latin markets usually carry good options, but the regular grocery store works too. If you can’t find fresh cayenne, red pepper flakes will work in a pinch, though the texture will be slightly coarser. The vinegar needs to be distilled white—apple cider vinegar adds unwanted sweetness here. For the garlic, smash the cloves with the side of your knife before chopping to release more flavor. That little extra step makes a difference.
No cayenne peppers? Red pepper flakes at double the amount (so 8 tsp instead of 4 peppers) will get you close, though the sauce will be chunkier. Want it milder? Strain out some of the finer particles or reduce the cayenne to 2 peppers. The sugar balances the heat—brown sugar adds molasses notes, so stick with white for authenticity. If you’re missing the olive oil, a splash of apple cider vinegar can help smooth things out, but it won’t be as rich. The water is just to thin the sauce slightly if needed—skip it if you prefer a thicker consistency. Salt to taste at the end, because everyone’s tolerance is different.
This sauce keeps for 3 months in the fridge, sealed tightly in a jar. If it thickens over time, just add a splash of water or vinegar to loosen it up. For gifting, sterilize small bottles first—hot water works, or pop them in the oven at 200°F for 10 minutes. The sauce also freezes beautifully for up to 6 months, though texture might change slightly. I always make a double batch—one for my kitchen, one to share. It’s the perfect pantry staple for quick flavor boosts.
Why You'll Love This Recipe
- No Fermentation Needed: I’ll admit—when I first saw this recipe, I thought, "Why bother fermenting when this works just as well?" Five minutes of chopping and blending, and you’ve got a sauce that’s got that same tangy punch without the wait.
- Garlic-Cayenne Magic: Honestly, the combo of fresh garlic and cayenne in white vinegar? It’s like a flavor bomb. The vinegar cuts through the heat, while the garlic adds this deep, savory layer that makes it way more complex than store-bought stuff.
- Pantry Staple Power: Between us, this sauce is the ultimate lazy-day hero. Keep it in the fridge for a month—it’s cheap, it’s fast, and it turns bland meals into something exciting. Drizzle it on eggs, toss it in soups, or use it as a marinade. No rules.
- Budget-Friendly Heat: I’ve spent way too much on specialty hot sauces that disappear in a week. This recipe costs pennies per serving, and the ingredients? You’re probably already using them. Plus, the heat level’s adjustable—so you can go mild or "why did I do this?" spicy.
Step-by-step instructions for non-fermented Tabasco sauce
Here's how to make a bright, peppery hot sauce without waiting weeks for fermentation.
Sterilize and Prepare the Peppers
Start by washing the 4 whole cayenne peppers thoroughly under cool water to remove any dirt or debris. This ensures a clean base for your sauce. Next, carefully slice off the tops of the peppers and remove the seeds and membranes using a small knife. Be sure to wear gloves if you're sensitive to capsaicin—the compound that gives peppers their heat. You'll want to keep the stems intact to create a natural funnel for the vinegar to penetrate the peppers.
Place the prepared peppers in a clean, dry glass jar with a tight-fitting lid. The jar should be sterilized by running it through a hot dishwasher cycle or boiling it in water for 5 minutes to eliminate any bacteria that could spoil your sauce. Let the jar cool completely before proceeding. This step is crucial for ensuring your sauce stays fresh and safe to eat without the long fermentation process.
Combine Ingredients in the Jar
In a small bowl, mix together the 1 cup white vinegar, 0.5 cup water, 1 tbsp sugar, 1.5 tsp salt, and 0.5 tsp ground black pepper. The sugar helps balance the acidity of the vinegar, while the salt and black pepper add depth of flavor. Stir until the sugar and salt are completely dissolved. This mixture will act as the liquid base for your sauce, carrying all the flavors and heat.
Pour this liquid mixture over the prepared cayenne peppers in the sterilized jar, making sure the peppers are fully submerged. Add the 2 cloves rough-chopped garlic cloves and the 1 tbsp extra-virgin olive oil on top. The olive oil adds richness and helps create a smoother texture in the final sauce. Seal the jar tightly and give it a gentle shake to ensure everything is well combined. This step is where all the flavors begin to meld together.
Infuse and Rest for Maximum Flavor
Place the sealed jar in a cool, dark place—such as a pantry or cupboard—for at least 2 weeks. This resting period allows the vinegar to fully extract the heat and flavor from the cayenne peppers, garlic, and other ingredients. You'll notice the liquid will start to turn a deep red color, indicating that the peppers are releasing their capsaicin and pigments into the vinegar. Shake the jar gently once a week to help distribute the flavors more evenly.
After 2 weeks, taste the sauce. It should have a bright, tangy flavor with a sharp heat from the cayenne peppers. If the heat isn't strong enough for your liking, you can leave it in the jar for another 1-2 weeks. The longer it infuses, the more intense the flavor will become. This method gives you full control over the heat level without the unpredictability of fermentation.
Strain and Bottle the Sauce
Once the sauce has reached your desired level of heat and flavor, it's time to strain out the peppers and garlic. Place a fine-mesh strainer or cheesecloth over a clean bowl and carefully pour the sauce through it. You can press gently on the peppers with a spoon to extract every last bit of flavor, but avoid squeezing too hard, as this can make the sauce bitter. Discard the used peppers and garlic.
Transfer the strained sauce to a clean glass bottle or jar, making sure to seal it tightly. Store the sauce in a cool, dark place for up to 1 year. The vinegar acts as a natural preservative, keeping the sauce safe to eat for an extended period. You can also refrigerate it for up to 6 months if you prefer a shorter shelf life. This sauce is now ready to add heat and brightness to any dish!
Pro Tips For Making Non Fermented Tabasco Sauce
- Simmer Slow and Steady: I learned this the hard way—boiling vinegar and peppers like a hot sauce will just burn the cayenne and turn your sauce bitter. Instead, bring the vinegar to a gentle simmer (just small bubbles, not a rolling boil) and let the peppers and garlic steep for 10-15 minutes. This softens the garlic without frying it and lets the cayenne’s heat mellow out.
- Seed and Toast the Peppers: Don’t just toss in whole cayenne peppers—seed them first (carefully, they’re spicy!) and give them a quick dry toast in a skillet for 30 seconds. This removes some of the raw bite and deepens the flavor. (Yes, even if you’re impatient like me.)
- Salt Before Straining: Add all your salt before straining the sauce through a fine-mesh sieve. The vinegar will pull out more flavor from the garlic and peppers if the salt is dissolved early, and you won’t end up with a watery, weak sauce later. Trust me, your taste buds will notice.
- Use a Splatter Screen: Vinegar and garlic cloves are a volatile combo—when you add the raw garlic, it’ll hiss and pop. Pop a splatter screen over the pot (or at least tilt the pan away from you) to avoid a vinegar bath on your stove and counter. (Your future self will thank you.)
Serving suggestions for leftovers
Taco & Tex-Mex Pairings
This sauce is a game-changer for tacos, nachos, and burrito bowls. Drizzle 1-2 teaspoons over crispy carne asada or shredded chicken for instant heat and tang. I love pairing it with corn tortillas and pickled red onions—the acidity in both components balances perfectly.
For extra richness, spread a thin layer on warm queso fresco before serving. The vinegar base also cuts through the fat in chorizo, making every bite more vibrant. 🌶️
Seafood Elevations
Seafood dishes get a serious upgrade with this sauce. Toss grilled shrimp or blackened fish fillets with 1 tablespoon of sauce in the last 2 minutes of cooking. The heat mellows slightly while the bright acidity complements the smoky char.
For ceviche, mix 1 teaspoon into the marinade to add depth—it works especially well with firm white fish like snapper or sea bass. A squeeze of lime afterward balances the flavors beautifully. I also love drizzling it over oysters on the half shell with a sprinkle of chives.
Cocktail & Drink Enhancer
This sauce isn’t just for food—it’s a secret weapon in cocktails. Rim margarita glasses with a mix of lime juice and sauce, then dip in tajín for a spicy-sweet kick. Stir 1 teaspoon into bloody marys or gin rickeys for a peppery punch.
For non-alcoholic drinks, add ½ teaspoon to sparkling water with mint or iced tea—it’s surprisingly refreshing. I once made a spicy paloma by mixing 2 teaspoons into the grapefruit juice before adding tequila and soda. The heat lingers just enough to wake up your palate. 🍹
Pasta & Noodle Dishes
Stir 1-2 tablespoons into creamy pasta sauces like Alfredo or carbonara to add a bright, spicy contrast. The vinegar cuts through the richness while the cayenne adds a slow-building heat.
For cold noodle salads, toss with udon or soba noodles, cucumber slices, and a drizzle of sesame oil—the sauce’s acidity makes it irresistibly fresh. I also love using it as a finishing sauce for ramen, where it enhances the broth without overpowering it.
A pinch of fresh basil on top ties everything together. 🍜
Grilled & Smoked Meats
Brush grilled steaks or smoked ribs with this sauce in the last 5 minutes of cooking for a glossy, spicy finish. The vinegar helps caramelize the meat’s surface, while the cayenne adds a smoky-sweet heat.
For pulled pork, mix 1 tablespoon into the barbecue sauce before serving—it cuts through the richness beautifully. I also use it as a marinade for chicken thighs (mixed with olive oil and garlic) before grilling. The sauce’s brightness pairs especially well with charred flavors. 🔥
Vegetable & Dip Ideas
Blend 2 tablespoons into hummus or guacamole for a spicy twist. The vinegar’s tang balances the creaminess of avocado, while the cayenne adds a slow burn.
For roasted vegetables, toss them with 1 tablespoon of olive oil, salt, and a drizzle of sauce before roasting—it caramelizes beautifully on sweet potatoes or bell peppers. I also love using it as a dip for crudités like carrots, celery, and jicama.
A sprinkle of toasted sesame seeds adds crunch. 🥕
Nutrition facts
Frequently asked questions
Why does this recipe skip fermentation?
Fermentation requires time and precise conditions, but this version delivers the same bright pepper heat using vinegar infusion. The acidity in vinegar extracts capsaicin and flavors from cayenne peppers instantly, creating a ready-to-use condiment in just 2 weeks—no waiting for weeks like traditional Tabasco. The sugar and salt help balance the acidity while preserving freshness.
Can I adjust the heat level?
For milder heat, reduce cayenne peppers to 2-3 whole peppers or strain out finer particles. For extra spice, add ½ teaspoon cayenne powder to the jar before sealing. Taste after 2 weeks—you can always add more cayenne powder later if needed.
What if I can’t find fresh cayenne peppers?
Use red pepper flakes instead—double the amount (8 teaspoons for 4 peppers) for similar heat. For a smoother texture, blend the flakes with vinegar first, then strain. Dried peppers work well, but fresh yields brighter flavor. Store-bought cayenne powder can also be used (1 teaspoon per 1 pepper).
How long will the sauce last?
Unopened, it keeps for 1 year in a cool, dark place. Once opened, refrigerate for 6 months or freeze for 6 months to preserve freshness. The vinegar acts as a natural preservative, but always check for mold or off smells before using. Sterilized jars extend shelf life significantly.
Can I make this sauce without olive oil?
Yes! Skip the olive oil or replace it with 1 extra teaspoon of vinegar to maintain balance. The oil adds richness, but the sauce will still have bright pepper heat. For a smoother texture, blend the strained sauce briefly—just 10 seconds—to break up any remaining particles.