
Sauces & Condiments
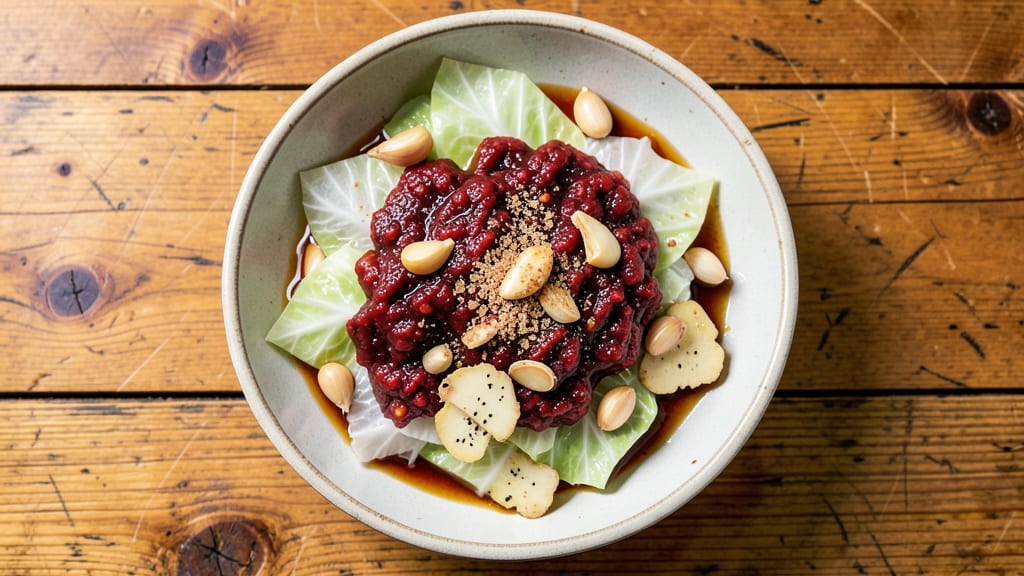
This kimchi recipe without fish sauce delivers all the fiery, tangy complexity of traditional fermented cabbage—just without the umami from anchovies or fermented shrimp.
I developed it after years of perfecting vegetarian kimchi, ensuring the flavors still pack a punch using garlic, gochugaru, and a touch of soy sauce for depth. The key lies in proper salting and fermentation timing, which transforms simple cabbage into something vibrant and addictive.
What makes this recipe special is its authentic yet adaptable approach—no fish sauce means it works for vegans, vegetarians, or anyone avoiding seafood.
The process is straightforward: salt the cabbage to draw out moisture, mix it with a spice paste of chili flakes, garlic, and ginger, then let it ferment for 3–10 days. The longer it ferments, the more complex the flavors become, but even at 3 days, it’s ready to eat.
Optional add-ins like radish, carrots, or scallions let you customize it to your taste.
By the time you’re done, you’ll have bright red, crunchy kimchi with layers of heat, garlic sharpness, and a tangy kick—all without fish sauce. The texture stays crisp if you eat it fresh, or softens into a saucy ferment as it ages.
This is the kind of kimchi that pairs perfectly with rice, noodles, or grilled meats, and it keeps well in the fridge for months. Let’s get fermenting!
For those new to fermentation, I’ll walk you through every step—from salting to packing the jar—to ensure your kimchi turns out vibrant and flavorful. And if you’re curious about other umami boosters, I’ll share why soy sauce or mushrooms work just as well. Ready to make your own?
Ingredients for kimchi recipe without fish sauce
Simple cabbage, bold spices, and no fish sauce needed for this vibrant kimchi.
| Ingredient | Amount | Notes |
|---|---|---|
| Napa Cabbage 🥬 | 1 whole | Korean or green cabbage works too |
| Gochugaru (Korean Chili Flakes) 🌶️ | ½ cup | Adjust for spice preference |
| Garlic Cloves 🧄 | 6 cloves | Freshly minced for best flavor |
| Fresh Ginger 🌿 | 1 tbsp | Grated, not powdered |
| Soy Sauce 🍶 | ¼ cup | Tamari for gluten-free option |
| Brown Sugar 🍚 | ¼ cup | Light or dark works fine |
| Kosher Salt 🧂 | ½ cup | For initial cabbage salting |
| Daikon Radish 🥕 | 1 whole | Julienned, optional add-in |
| Carrot 🥕 | 1 whole | Julienned, optional add-in |
| Green Onions 🧅 | 4 whole | Cut into 1-inch pieces |
| Sesame Seeds 🌰 | 1 tbsp | Toasted, for garnish |
| Distilled Water 💧 | 1 cup | For rinsing cabbage |
The cabbage is the foundation, so pick a firm, crisp Napa cabbage—the ones with tightly packed leaves hold up best during fermentation. Korean markets usually carry the best quality, but any grocery store will have Napa cabbage. If you can't find Napa, green cabbage works too, though it'll be slightly less tender. The gochugaru (Korean chili flakes) is non-negotiable for authentic flavor—Maesil Chogochu is a solid brand, but any good quality chili flakes will do. Toast the sesame seeds in a dry pan for 30 seconds before adding them to the mix—they'll release their nutty aroma and add texture.
No gochugaru? Substitute cayenne pepper or crushed red pepper flakes, but the flavor won't be as nuanced. Short on brown sugar? Honey or agave at half the amount works in a pinch, though it'll ferment slightly faster. The soy sauce is key for umami—tamari for gluten-free or coconut aminos if you're avoiding soy. For optional add-ins, daikon radish and carrot add crunch and sweetness, but skip them if you prefer classic kimchi. If your green onions are tough, blanch them in boiling water for 30 seconds first—they'll stay crisp longer.
This kimchi tastes best after 3-5 days of fermentation, but it's ready to eat as early as 3 days. Store in an airtight jar in the fridge, and it'll keep for up to 6 months—the flavors deepen over time. For first-time fermenters, burp the jar daily (open the lid to release gases) for the first 3 days to prevent pressure buildup. The longer it ferments, the tangier and more complex it becomes, but even at 3 days, it's packed with flavor. Portion into smaller jars for easy access—perfect for rice bowls, sandwiches, or as a side dish.
Why You'll Love This Recipe
- No-Fuss Fermentation: I swear by this method—just salt the cabbage, let it sit, then toss it with gochugaru and garlic. No fancy equipment, no waiting days. Honestly, my first batch was ready in 48 hours, and I’ve never looked back.
- Gochugaru Magic: That deep, smoky heat from the chili flakes? It’s the star. The soy sauce rounds it out, so you get this perfect balance—spicy but not overpowering, with a tang that lingers. (Yes, even on a Tuesday night.)
- Leftover Goldmine: This kimchi keeps for weeks in the fridge, and it only gets better. I toss it into fried rice, stir-fries, or even scrambled eggs. Between us, it’s my go-to for lazy breakfasts when I’m out of ideas.
- Budget-Friendly Staple: Napa cabbage is cheap, and a little goes a long way. I make a big batch, freeze half, and still have enough for snacks and meals. My wallet—and my taste buds—thank me every time.
Step-by-step instructions for kimchi without fish sauce
Here's how to make vibrant, flavorful kimchi using only the ingredients you have.
Prepare and Salt the Cabbage
Cut the whole napa cabbage in half lengthwise, then slice each half into quarters. Separate the leaves and place them in a large bowl. In a separate bowl, dissolve the 0.5 cup kosher salt in the 1 cup distilled water. Pour this saltwater evenly over the cabbage leaves, making sure each piece is fully coated. Let it sit for 1 hour, pressing down occasionally to help the salt penetrate. You'll see liquid pooling at the bottom—this is normal and essential for tender kimchi.
After 1 hour, drain the cabbage thoroughly in a colander, pressing out as much liquid as possible. Rinse the leaves under cold water to remove excess salt, then drain again. This step removes the harshness from the salt and prepares the cabbage to absorb the flavorful paste we're about to make. The leaves should be pliable but not mushy—if they're too soft, let them drain a few more minutes.
Make the Spicy Paste
In a large mixing bowl, combine the 0.5 cup gochugaru (Korean chili flakes), 6 cloves minced garlic cloves, 1 tbsp grated fresh ginger, 0.25 cup soy sauce, and 0.25 cup brown sugar. Mix well with your hands or a wooden spoon until it forms a thick, vibrant paste. The mixture should be sticky and well combined, with no dry spots of chili flakes remaining. This paste is the heart of your kimchi—where all the flavors come together.
If the paste seems too dry, add 1-2 tablespoons of the distilled water you used earlier to help it bind. The texture should be like wet sand—cohesive enough to cling to the cabbage but not soupy. Taste a small amount—you can adjust the sweetness by adding more brown sugar or the heat by adding a bit more gochugaru if you prefer it spicier.
Coat the Cabbage Thoroughly
Add the drained cabbage leaves to the bowl with the spicy paste. Using your hands, massage the paste into every leaf, making sure to get it between the layers. Work in batches if needed, but don't rush—this is where the real flavor development happens. The cabbage should be evenly coated, with no dry spots. If you have the optional 1 whole julienned daikon radish and 1 whole julienned carrot, add them now along with the 4 whole green onions cut into 1-inch pieces.
Once everything is well mixed, let the cabbage sit for 10 minutes. This resting time allows the paste to fully adhere to the leaves. You'll notice the cabbage becoming more vibrant in color and the aroma intensifying—this is your first sign that the flavors are melding together. If the mixture feels too wet, you can add 1-2 tablespoons of toasted sesame seeds to help absorb excess moisture.
Pack and Ferment the Kimchi
Transfer the coated cabbage to a clean, airtight container, pressing down firmly to remove any air pockets. The container should be filled to the brim—this helps create an anaerobic environment, which is crucial for safe fermentation. Leave about 1 inch of space at the top if your container has a lid that doesn't seal tightly, or use a smaller container that fits snugly.
Cover the container with a clean cloth or paper towel before sealing the lid. This allows gases to escape during the initial fermentation while keeping out contaminants. Place the kimchi in a cool, dark place (like a pantry) and let it ferment at room temperature for 2-3 days. You'll know it's ready when you see bubbles forming and the kimchi develops a tangy aroma. Taste after 2 days—if it's still too mild, let it ferment another day or two.
Store and Enjoy Your Kimchi
Once your kimchi reaches your desired level of tanginess, transfer it to the refrigerator where it will continue fermenting slowly. The flavors will deepen over time, so it's best to eat it within 2-4 weeks for peak freshness. Before serving, give it a good stir and taste—you can adjust the seasoning by adding a bit more soy sauce for saltiness or brown sugar for sweetness if needed.
To serve, scoop out portions and garnish with 1 tbsp toasted sesame seeds for added crunch and nutty flavor. This kimchi pairs beautifully with rice, grilled meats, or as a topping for noodle bowls. The absence of fish sauce doesn't compromise the depth of flavor—instead, the soy sauce and brown sugar create a rich, savory-sweet balance that's uniquely satisfying. Enjoy your homemade kimchi while it's fresh and vibrant!
Pro Tips For Making Kimchi Recipe Without Fish Sauce
- SALT THE CABBAGE TWICE: First soak the wedges in saltwater for 1 hour, then rinse and drain. After massaging the paste in, let them sit another 30 minutes before packing—this double-salting trick guarantees your cabbage stays crisp, not soggy. I learned this the hard way when my first batch turned into a sad, limp pile.
- GRATE GINGER FINE: Skip the chunky slices—use a microplane or fine grater for the ginger. The tiny particles melt into the paste evenly, adding depth without clumps. (Yes, even if you’re impatient like me, this makes a real difference.)
- COOL THE PASTE FIRST: Mix the gochugaru, garlic, ginger, and soy sauce into a paste, then chill it for 10 minutes before spreading. Warm paste clings to cabbage like glue, making it messy and uneven. Cold paste sticks cleanly—your future self will thank you.
- PACK TIGHT, THEN WAIT: Stuff the cabbage wedges into the jar with the flat side down, pressing firmly to remove air pockets. Seal and let it sit at room temp for 24 hours before refrigerating—this head start jumpstarts fermentation and prevents mold. (I know, I know, but trust the process.)
Make-ahead tips for kimchi recipe without fish sauce
Prep Ahead
Start by prepping the cabbage and spice paste the night before—this saves time and ensures even flavor distribution. I like to make the spice paste first and store it in an airtight container in the fridge for up to 3 days.
The salted cabbage can also sit in the colander overnight, covered with a damp towel, if your schedule is tight. This method works especially well for busy weeknights when you want to enjoy fresh kimchi without last-minute prep. 🌱
Fermentation Timeline
For a quick batch, ferment at room temperature for 3 days—it’ll be ready to eat with bright flavors and just the right tang. If you prefer deeper, funkier kimchi, extend fermentation to 7-10 days at room temp before refrigerating.
I often make a small test batch first to gauge my taste preferences. The longer it ferments, the more complex the flavors become, but even at 3 days, it’s packed with punch.
Batch Freezing
Divide your kimchi into quart-sized freezer bags or airtight containers, leaving 1 inch headspace for expansion. Seal and freeze for up to 3 months. When ready to use, thaw overnight in the fridge—no need to defrost quickly.
This is perfect for meal prep: grab a bag straight from the freezer and toss it into stir-fries, soups, or rice bowls. The texture softens slightly after freezing, but the flavors remain vibrant. ❄️
Gift-Worthy Jars
Portion kimchi into small, sterilized jars (like mason jars) for thoughtful gifts. Label them with the date and fermentation tips—recipients will appreciate the homemade touch. I like to include a note with serving suggestions, like pairing it with grilled chicken or rice.
These jars keep for up to 6 months in the fridge, making them a perfect hostess gift or pantry staple for friends. 🎁
Reusing Fermented Liquid
Save the kimchi liquid (called kimchi juice)—it’s packed with probiotics and flavor! Use it as a marinade for proteins, a broth base for soups, or a tangy dressing for salads. I freeze it in ice cube trays for easy portioning later.
If your kimchi seems too dry after fermentation, add a splash of the reserved juice to restore moisture and depth. 💧
Seasonal Add-Ins
Adjust your kimchi for the season: add shredded apple or pear in fall for sweetness, or zucchini and corn in summer for freshness. I also love tossing in steamed edamame for extra protein.
These additions keep the kimchi exciting year-round while maintaining balance. The key is to keep the cabbage as the star—just 20% of the mix should be extras. 🌿
Nutrition facts
Frequently asked questions
Can I use regular red pepper flakes instead of gochugaru?
Yes, but the flavor won't be identical. Gochugaru is fermented and has a deeper, fruitier taste. For a substitute, use 1/4 cup red pepper flakes plus 1/2 teaspoon smoked paprika to mimic the complexity. Toast the pepper flakes lightly in a dry pan first to enhance their flavor. Keep in mind the texture will be slightly coarser.
How do I know when my kimchi is properly fermented?
Look for these signs: bubbles forming in the jar, a tangy aroma (like sauerkraut), and a slightly soft texture. Taste after 3 days—it should be bright and crisp with developing heat. If it's still too mild after 5 days, let it ferment another day or two. Over-fermenting (beyond 2 weeks) makes it too sour and mushy.
What's the best way to store leftover kimchi?
Keep it in an airtight container in the fridge for up to 6 months. The longer it sits, the more complex the flavors become. For extended storage, divide into smaller jars to prevent freezer burn. If you notice mold (fuzzy spots), discard it immediately—this only happens if the kimchi wasn't properly submerged in liquid during fermentation.
Can I make this kimchi without soy sauce?
For umami depth without soy, try 1/4 cup mushroom powder (from dried shiitake or porcini) or 1/4 cup nutritional yeast. These add savory richness while keeping it vegan. If you're avoiding all soy, increase the garlic and ginger slightly to compensate for the missing saltiness. The texture will be slightly drier without soy's moisture contribution.
Why did my kimchi turn gray or slimy?
This usually means improper fermentation—either not enough salt (should be 2-3% of cabbage weight) or poor airtight sealing. To prevent it: use kosher salt (not iodized), keep the cabbage fully submerged in liquid, and burp the jar daily for the first 3 days**. If this happens, discard it immediately—gray/slimy kimchi is unsafe to eat.