Breakfast & Brunch
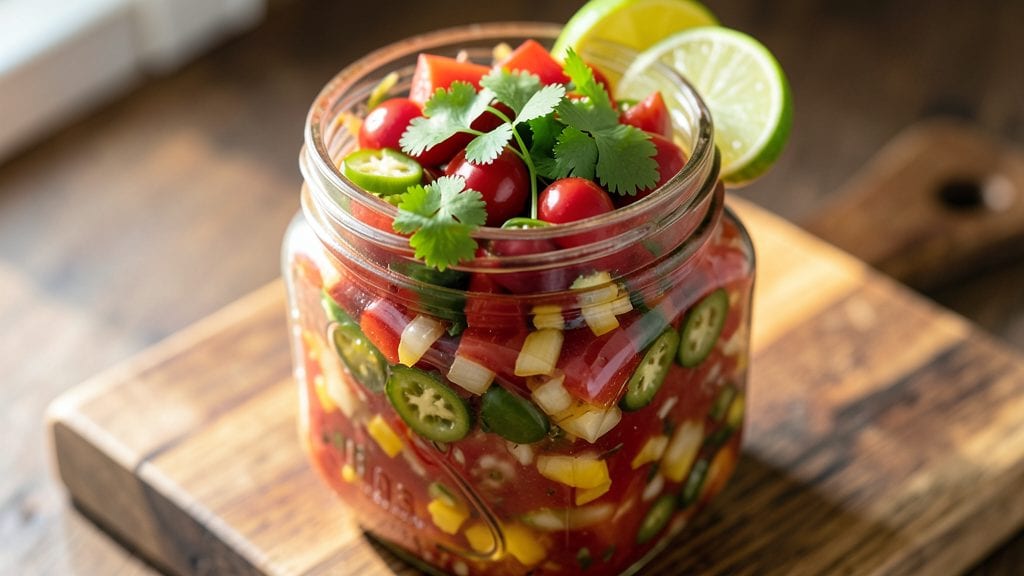
Creating a no-cook freezer salsa recipe that delivers bold flavor and lasts months without spoiling is a game-changer for busy mornings. This pantry-friendly version requires just 10 minutes of prep and eliminates the need for last-minute chopping or fresh ingredients.
The secret lies in acidification—using lime juice and vinegar—to preserve freshness while maintaining vibrant, tangy flavors that develop over time.
What makes this salsa truly special is its versatility and shelf stability. You can store it in the freezer for up to 6 months, making it perfect for stocking your pantry or prepping for meal prep.
The texture remains chunky and satisfying, whether you're using it as a topping for breakfast tacos, a dip for tortilla chips, or a flavor booster for scrambled eggs and avocado toast. No cooking means no heat, no mess, and no risk of overcooking.
The result is a salsa that tastes like it was just made—bright, zesty, and full of layered flavors from tomatoes, onions, and peppers. The acidity keeps it fresh, while the spices add depth that only improves with time.
This isn’t just a pantry staple; it’s a foolproof way to elevate any breakfast or brunch without the effort.
Best of all, you can customize it with your favorite ingredients—hotter peppers, extra cilantro, or even a touch of honey for sweetness. Once you master this technique, you’ll never buy store-bought salsa again. Let’s get started with the ingredients and steps to make it your new kitchen essential.
Ingredients for no cook freezer salsa
Ten simple ingredients transform into freezer-friendly salsa that keeps vibrant for months.
| Ingredient | Amount | Notes |
|---|---|---|
| Canned Diced Tomatoes 🍅 | 2 cups | No salt added preferred |
| Yellow Onion 🧅 | 1 whole | Finely diced, about 1 cup |
| Jalapeño Pepper 🌶️ | 1 whole | Seeds removed for mild heat |
| Fresh Cilantro 🌿 | ½ cup | Chopped, stems removed |
| Fresh Lime Juice 🍋 | ½ cup | Freshly squeezed |
| White Vinegar 💧 | ¼ cup | For acidification |
| Granulated Sugar 🍚 | 2 tbsp | Balances acidity |
| Salt 🧂 | 1 tsp | Kosher or sea salt |
| Ground Cumin 🌿 | ½ tsp | Toasted for depth |
| Garlic Powder 🧄 | ½ tsp | Fresh preferred |
The canned tomatoes are the backbone here—Muir Glen or Hunt's no-salt-added are my go-tos, but any good-quality brand works. Look for diced tomatoes with juices included; those extra juices help with texture. The jalapeño is key for heat, but remove seeds and ribs if you prefer milder salsa. Fresh cilantro makes all the difference, but if you're prepping ahead, add it fresh just before serving—it doesn’t freeze well. For lime juice, Mexican limes or regular limes both work, but squeeze them fresh. The vinegar and sugar combo is what makes this last months in the freezer—don’t skip it.
No fresh cilantro? Dried cilantro or extra cumin adds a similar earthy note. Want it sweeter? Swap sugar for honey or agave at the same amount. No jalapeño? Serrano or bell peppers work great—just adjust heat to taste. The garlic powder can be swapped for 1 fresh clove minced, but it won’t hold up as well in freezing. For extra acidity, add a splash of lemon juice too. And if you’re worried about texture, add 1 tbsp cornstarch to thicken it up before freezing.
This salsa freezes beautifully—just portion into ziplock bags or airtight containers and flatten the bags to save space. It’ll keep for 6 months without losing flavor. When ready to use, thaw overnight in the fridge or microwave for 30 seconds. The texture stays chunky and fresh-tasting, like you just made it. For best results, shake or stir well after thawing—it’ll separate a bit. Make a double batch; you’ll want this on hand for everything from tacos to grilled fish.
Why You'll Love This Recipe
- No Chopping Needed: I swear by this—just dump the canned tomatoes, dice the onion (or buy pre-diced if you’re really lazy), toss in the jalapeño and cilantro, and pulse. Zero knife skills required, and honestly, the texture’s so chunky you’d never know.
- Zesty Brightness: That lime juice hits different when it’s fresh-squeezed straight into the mix. The jalapeño adds a slow-building heat, while the cilantro keeps it bright—like a sunbeam in a bowl. (Yes, even on a Tuesday night.)
- Freezer-Friendly Flex: Make a double batch, freeze half, and thank me later. It’s perfect for game day, tacos, or when you’re too tired to cook. Just thaw and serve—no reheating, no fuss. My go-to for lazy Sundays.
- Pantry Staple Magic: Canned tomatoes, onion, lime—stuff you already have. No specialty ingredients, no last-minute grocery runs. It’s the kind of recipe that saves money and time, and somehow still tastes like you slaved over it. (Between us, it’s my secret weapon.)
Step-by-step instructions for no-cook freezer salsa
This method keeps prep simple while delivering bold, restaurant-quality flavor that freezes beautifully.
Finely Dice the Onion and Jalapeño
Start by finely dicing the whole yellow onion into small, even pieces—about the size of a pea. I like to cut it into quarters first, then remove the stem and slice thinly. For the jalapeño, remove seeds and membranes first if you prefer mild heat, then chop into tiny pieces similar to the onion. This ensures even distribution of flavor throughout the salsa.
Place both chopped ingredients in a medium mixing bowl. The onion should yield about 1 cup when finely diced, which matches the quantity we need. If you find chopping tedious, a food processor with a fine blade works well, but chopping by hand gives you better control over texture.
Combine Wet Ingredients with the Vegetables
Add the 2 cups canned diced tomatoes to the bowl with the chopped onion and jalapeño. These tomatoes should be no-salt-added to maintain control over seasoning. Next, pour in the 0.5 cup freshly squeezed lime juice—this brightens the flavors and helps preserve the salsa in the freezer.
Stir everything together until the tomatoes are evenly distributed. You'll notice the mixture looks slightly watery at this point—that's normal. The acid from the lime juice will help thicken the salsa as it sits, but we'll also add vinegar next to balance the flavors and extend shelf life.
Add Vinegar, Sugar, and Seasonings
Measure out the 0.25 cup white vinegar and stir it into the mixture. This might seem like a lot, but it's essential for both flavor and preservation—it acts as a natural preservative that helps the salsa last months in the freezer. Next, add the 2 tablespoons granulated sugar, which helps balance the acidity from the vinegar and lime juice.
Sprinkle in the 1 teaspoon salt, 0.5 teaspoon ground cumin, and 0.5 teaspoon garlic powder. Mix thoroughly until all the dry ingredients dissolve and the flavors are evenly distributed. The cumin and garlic powder add depth that really makes this salsa stand out—don't skip these!
Fold in Fresh Cilantro
Finally, add the 0.5 cup chopped fresh cilantro, reserving a few sprigs for garnish if desired. Gently fold it in with a spoon to preserve its bright green color. The cilantro adds freshness that balances the acidity and heat from the jalapeño. Taste the mixture now—it should be vibrant, tangy, and well-seasoned.
If you prefer a chunkier texture, you can leave some of the tomatoes and vegetables slightly larger. For a smoother salsa, you can pulse everything briefly in a food processor after mixing. Either way, the flavor will be excellent—this step is just about preference.
Package and Freeze for Long-Term Storage
Transfer the salsa to airtight containers or heavy-duty freezer bags. I like to use quart-sized freezer bags with the air squeezed out before sealing—this prevents freezer burn and makes it easy to portion out later. Leave about 1 inch of headspace at the top since the mixture will expand as it freezes.
Label each container with the date and contents. This salsa will keep in the freezer for up to 6 months without losing flavor. When you're ready to use it, thaw in the refrigerator overnight or microwave for 1-2 minutes until heated through. The texture might be slightly softer after freezing, but the bold flavors will still shine.
Pro Tips For Making No Cook Freezer Salsa
- Drain Those Tomatoes: Skip the juice—dump canned tomatoes into a strainer and let them sit for 10 minutes. You’ll cut down on watery salsa later, and that’s the thing that matters most when freezing. (Yes, even if you’re impatient like me.)
- Pulse the Jalapeño: Remove seeds and membranes first, then finely chop the jalapeño with a knife or pulse in a food processor—just until it’s tiny. This keeps the heat even and avoids clumps that turn your salsa into a spicy surprise when thawed.
- Salt Before Freezing: Add salt (about 1 teaspoon per pint) before freezing—it blends in better and prevents blandness later. Trust me, you’ll taste the difference when you thaw it in 3 months and forget to season again.
- Freeze in Portions: Divide salsa into 1-cup portions in small containers or freezer bags. This way, you thaw only what you need, and no one will ever complain about “too much salsa” ruining their meal. (Your future self will thank you.)
Common mistakes when making this recipe
Skipping Acidification
The biggest mistake is omitting or underestimating the acidification step. The combination of lime juice and vinegar isn’t just for flavor—it’s what preserves your salsa safely in the freezer. Without proper acidity, harmful bacteria can grow even in the freezer.
I’ve seen people skip the vinegar entirely, thinking it’ll taste too sharp, but ¼ cup is just enough to preserve without overpowering. Always use fresh lime juice—bottled won’t cut it for preservation. 🌶️
Using Salted Tomatoes
Never use canned tomatoes with added salt—it throws off the entire balance. The 1 teaspoon salt we add is carefully measured to complement the flavors, not overpower them. Salted tomatoes can make your salsa taste bland or even salty after freezing.
Always check labels for "no salt added" to maintain control over seasoning. I’ve ruined batches by forgetting this detail, and it’s a flavor killer. 🧂
Improper Storage Containers
Using regular plastic containers or bags without proper sealing leads to freezer burn and texture degradation. Always opt for airtight containers or heavy-duty freezer bags with all air squeezed out. I recommend quart-sized freezer bags or glass Pyrex containers—they prevent ice crystals from ruining the texture.
Leave 1 inch headspace for expansion, or you’ll end up with a messy spill. ❄️
Adding Fresh Cilantro Too Early
Fresh cilantro freezes poorly and turns mushy, so adding it before freezing is a common mistake. Instead, reserve it for garnishing or add it fresh just before serving. If you must freeze it in, use dried cilantro (about 1 teaspoon) as a substitute.
I’ve seen people freeze salsa with fresh cilantro only to be disappointed by its texture later. Save the fresh herb for when you’re ready to eat. 🌿
Ignoring Texture Adjustments
Some people assume the salsa will hold its perfect texture after freezing, but that’s not always the case. If you prefer a thicker consistency, add 1 tablespoon cornstarch before freezing. For chunkier salsa, leave larger pieces of onion or tomato.
After thawing, stir well—it’ll naturally separate a bit. I’ve had batches turn into a watery mess because I didn’t account for this. Always taste and adjust before freezing. 💡
Overlooking Thawing Properly
Microwaving frozen salsa straight from the freezer can make it watery and lose its vibrant flavors. Always thaw it overnight in the fridge for the best results. If you’re in a hurry, microwave in 30-second intervals, stirring between each, until heated through.
Never skip the thawing step—it’s what brings back the chunky, fresh-tasting texture. I’ve had people complain about their salsa tasting bland after reheating too quickly. 🔥
Nutrition facts
Frequently asked questions
Why does this salsa need vinegar if I'm freezing it?
The vinegar is essential for both flavor and food safety. It acts as a natural preservative that prevents bacterial growth, even in the freezer. Just ¼ cup balances the acidity without overpowering the taste. The combination of lime juice and vinegar creates a pH level that keeps your salsa safe for up to 6 months in the freezer.
Can I make this salsa without fresh lime juice?
Fresh lime juice is ideal, but in a pinch, you can use lemon juice or even bottled lime juice (though fresh is always better for preservation). For every 0.5 cup of lime juice needed, substitute with 0.4 cup lemon juice or 0.3 cup bottled lime juice. The acidity level matters most for safety and flavor.
How do I adjust the heat level in this recipe?
For milder salsa, remove all seeds and membranes from the jalapeño before chopping. For extra heat, add ½ teaspoon cayenne pepper or swap in a serrano pepper. If you prefer smoky flavor, add ½ teaspoon smoked paprika. Always taste before freezing to ensure your preferred spice level.
Can I use this salsa for cooking instead of just as a dip?
This salsa works beautifully in cooked dishes like tacos, grilled chicken, or scrambled eggs. Just thaw it completely first and adjust seasoning if needed. The acidity helps tenderize meats, making it perfect for marinades too. For best results, heat gently on the stove for 2-3 minutes before using.